

Dentsply
Dentsply Integrity Temporary Crown And Bridge Material - A2
Dentsply Integrity Temporary Crown And Bridge Material - A2
Couldn't load pickup availability
Dentsply Integrity Temporary Crown and Bridge Material with Fluorescence is a two-component material designed for creating temporary crowns and bridges. It is an automixed material that consists of multi-functional methacrylic esters. This versatile material can be used for both short-term and long-term temporary restorations. The Integrity Temporary Crown & Bridge Material with Fluorescence offers several benefits. It allows for the fabrication of temporaries that are not only fast and strong but also aesthetically pleasing. The material has a consistent texture with minimal shrinkage, enabling easy handling and reducing the need for adjustments. This feature saves valuable time for dental professionals. The packaging of Integrity Temporary Crown and Bridge Material in a cartridge format serves to simplify delivery and minimize product waste. The indications for using this material include the direct fabrication of temporary restorations such as veneers, inlays, onlays, crowns, and bridges. These temporaries are typically employed in indirect restorative procedures.
Features
Features
- Perfect mix ratio with no cross contamination.
- Less than 5° C temperature change in the mouth during setting.
- Does not damage the pulp and offers great patient comfort.
- Bonds to itself for easy repair.
- Polishes to a natural luster for superb results.
- Great consistency for easy handling and cleanup
- Great esthetics.
Description
Description
Specification
Specification
- Immediately before each use - Bleed cartridge prior to inserting new mix tip
- 0-5 seconds - Material dispensed into preliminary impression
- 5-45 seconds - Material inserted into the mouth
- 2-3 minutes - Removal from mouth
- 6 minutes - Remove the O2-inhibited layer and begin to trim the excess with-rotary instruments
- 7 minutes - Complete contours and polish
Composition
- Barium glass
- Fumed Silica
- Methacrylate Monomers
- Catalyst
- Stabilizers
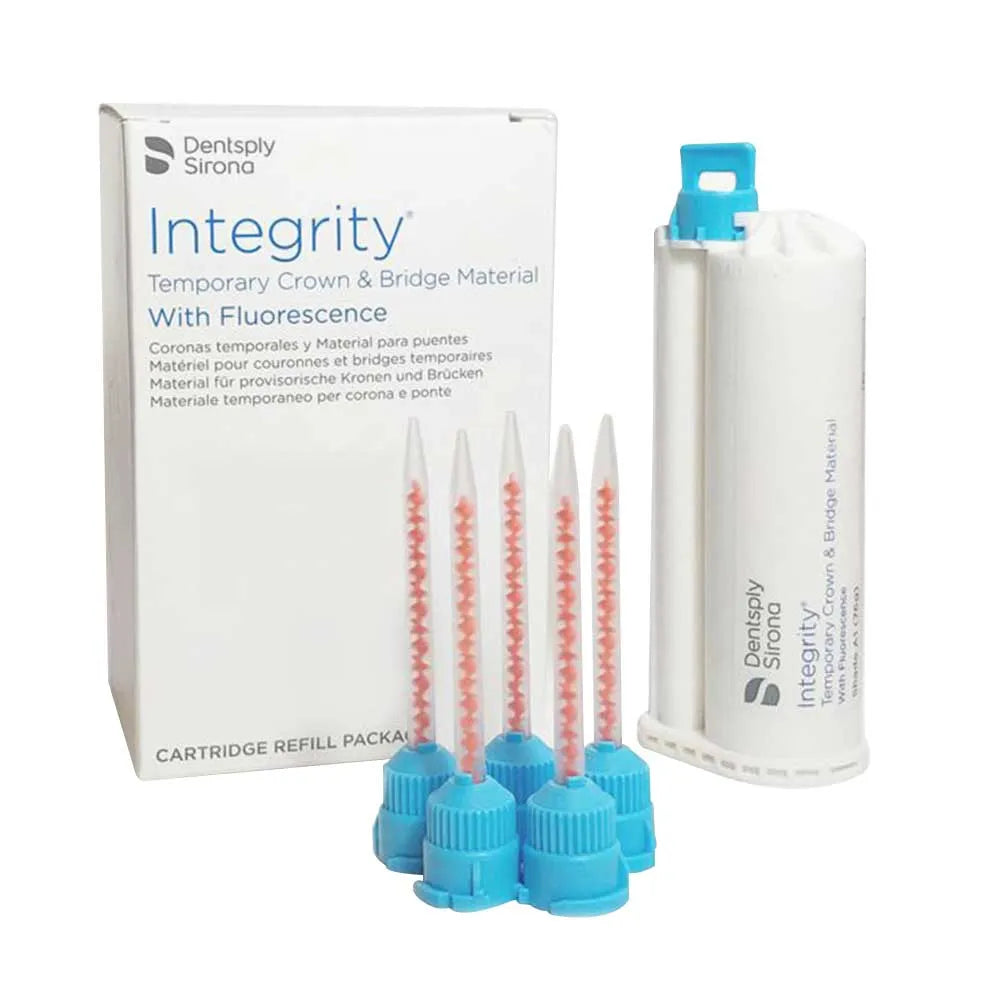
Packaging
Packaging
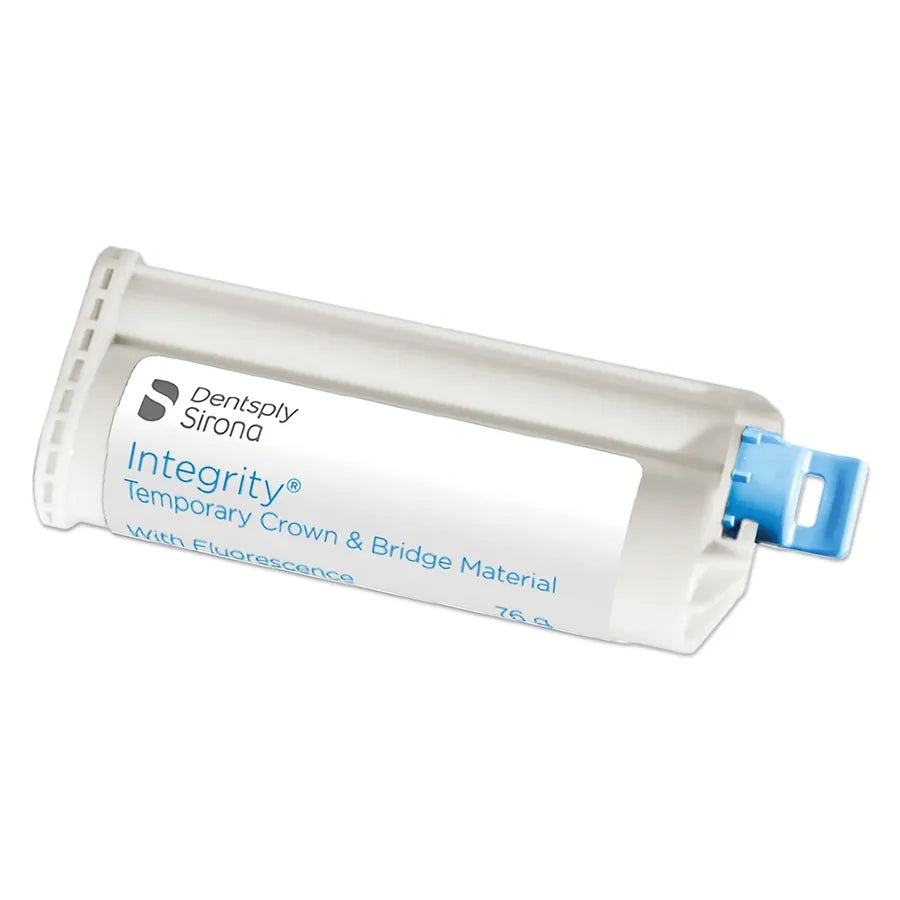
- 1 x 76gm Cartridge
- 20 x Small Mixing Tips
Direction to use
Direction to use
- Raise the release lever vertically upward, while simultaneously pulling the plunger all the wayback in the dispenser handle.
Cartridge Loading :
- Open cartridge lock by lifting up top clasp.
- Orient and insert cartridge with notch facing down.
- Close the top clasp to lock cartridge into dispenser gun.
- Remove the cartridge cap by turning 90° counterclockwise. Discard the cartridge cap.
- The used mixing tip can be disinfected and left in place until the next use to serve as a self-sealing cap.
Dispensing :
- Dispense and discard a “pea” size amount of base and catalyst before installing mix tip to ensure even flow from cartridge. Use gentle pressure. Be sure no plug is present. If any plug blocks flow, clear with an instrument. Wipe away excess from the cartridge carefully so base and catalyst do not cross contaminate and cause obstruction of the nozzle.
- Install a mixing tip on the cartridge by lining up the notch on the outside rim of the mix tip with the notch on the cartridge flange. If mix tip does not seat easily, be sure the internal end view of the mix tip is aligned correctly. The mix tip itself can turn in its cap.
The two holes should line up with the piece that is on the outside rim of the mix tip cap to facilitate inserting. Turn tip to align in its cap. - When mix tip notch is lined up with the notch on the cartridge flange, turn mix tip cap 90° in a clockwise direction to lock in place on cartridge.
- Squeeze dispenser trigger with moderate and even pressure to begin mixing/dispensing material. Material will stop flowing after trigger is released. Disinfect barrels and used mix tip for storage. Immediately prior to next use, bleed syringe and install new mix tip as outlined above.
- To remove cartridge, push up lever and pull slide flush. Lift plastic lever on the top of gun and remove cartridge.
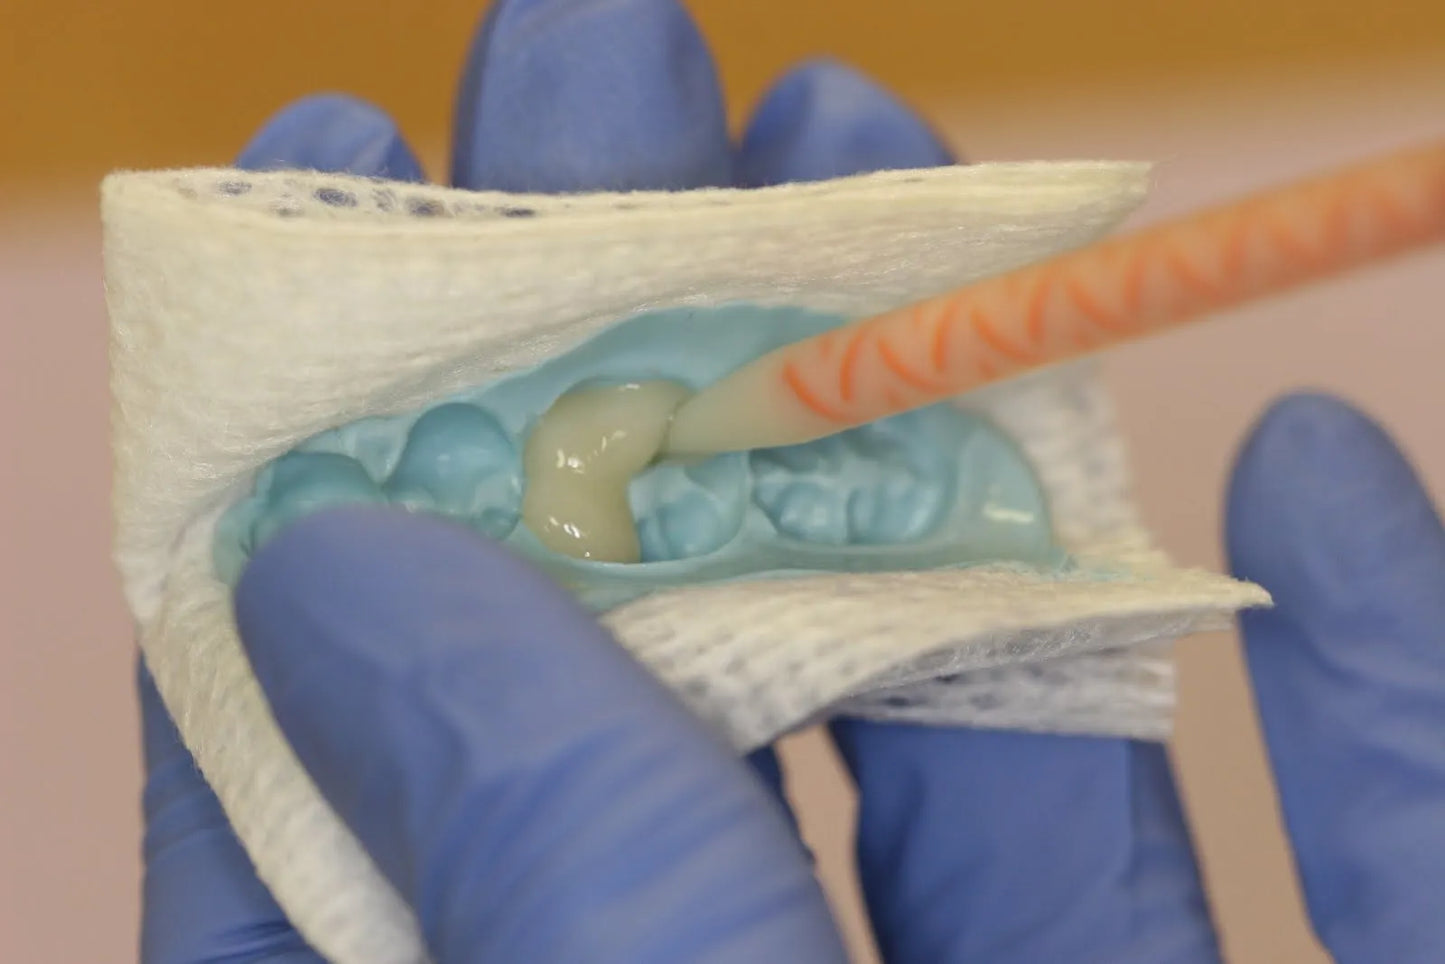
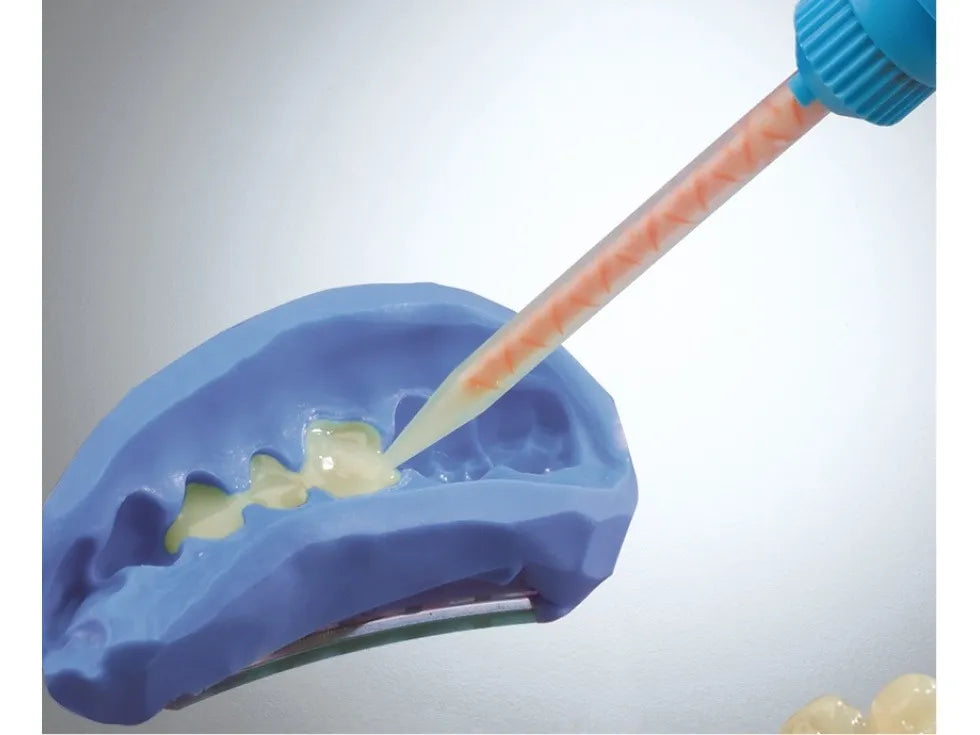
- Dispense a small amount through the mix tip onto a mixing pad and discard. Without delay, begin dispensing Integrity Material directly into the preliminary impression into the area of the preparation by applying continuous, light pressure to the dispensing apparatus handle. As the material comes out of the mixing tip, inject it into the deepest portion of the preliminary impression and then into the gingival areas, keeping the mixing tip immersed in the material to prevent bubbles. Reseat the preliminary impression into the patient’s mouth in the proper relative position within 45 seconds of the start of mix.
- Leave impression in place for approximately 2-3 minutes from the start of the mix.
Remove the impression containing the Integrity Material restoration during the firm elastic stage. - At this elastic phase, gross excess may be quickly trimmed with sharp scissors, being careful not to distort the restoration or margins.
Additional info
Additional info
Warranty
Warranty
Product Related Questions
Product Related Questions
Question: What is Dentsply Integrity Temporary Crown and Bridge Material with Fluorescence?Answer: Dentsply Integrity Temporary Crown and Bridge Material with Fluorescence is a two-component material designed specifically for creating temporary crowns and bridges. It is an automixed material comprising multi-functional methacrylic esters, which provide versatility for both short-term and long-term temporary restorations.
Question: What are the benefits of using Integrity Temporary Crown and Bridge Material with Fluorescence?
Answer: This material offers several advantages. It allows for the fabrication of temporaries that are fast, strong, and aesthetically pleasing. Its consistent texture with minimal shrinkage ensures easy handling and reduces the need for adjustments, ultimately saving valuable time for dental professionals.
Question: How should I handle and dispense the material from the cartridge?
Answer: Before each use, it is recommended to bleed the cartridge by inserting a new mix tip and extruding a small amount of material. The material should then be dispensed directly into a preliminary impression within 0-5 seconds and inserted into the patient's mouth within 5-45 seconds.
Question: Can I use rotary instruments to trim and shape the temporary restorations?
Answer: Yes, after removing the temporary restorations from the mouth (2-3 minutes), you can remove the O2-inhibited layer and begin trimming the excess using rotary instruments. This step is typically done around 6 minutes after removal.
Share